NEEDLE HEIGHT VERSUS LOOPER
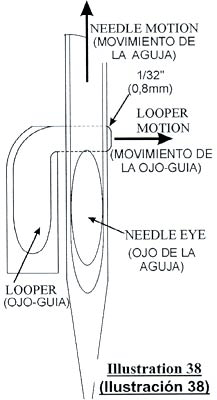
- Always adjust the needle height after the looper stroke adjustments have been made. See LOOPER ADJUSTMENTS (TIMING).
- Remove the needle bar guard.
- Turn the machine pulley in a clockwise direction until the looper begins to come forward, toward the needle (which is beginning to move upward).
- As the looper passes behind the needle, the point of the looper (moving to the right) should just begin to be visible (1/32″ or .8mm) past the right edge of the looper hook is seen in the top of the needle eye. (see illustration)
IF AN ADJUSTMENT IS NECESSARY, PERFORM THE FOLLOWING STEPS:
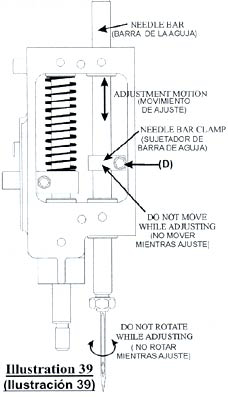
- Slightly loosen the set screw (D) on the needle bar clamp assembly. (see illustration)
- Move the needle bar up or down until you reach the adjustment shown in tip illustration.
- Be sure that you do not rotate the needle bar or the machine pulley as you are performing this step.
- When the proper setting is reached, tighten the set screw (D).